Tools of the Trade: Painting Essentials

This comprehensive starter guide dives into the fundamental equipment needed to embark on your miniature painting journey, whether you are a complete beginner or a seasoned hobbyist seeking for tips and recommendations.

Tools of the Trade: Painting Essentials

Getting started

If you are starting out in miniature painting, you may find yourself at a loss when faced with the myriad of possibilities, brands, tooling options, and price points available. In order to clarify this, I have drawn upon my personal experience to design this series of comprehensive textbooks aimed at beginners. My goal is to recommend reliable equipment that I have tested myself, so that you can start your hobby journey in the best conditions.

Tools of the Trade: Weathering Essentials
As a complement to my guide to painting essentials, let’s go over the equipment you’ll need to master the basics of weathering techniques, whether you’re just starting out or looking for recommandations to upgrade your toolkit.
Tools of the Trade: Kitbashing Essentials
Looking to get started with kitbashing? Choosing the right tools can be a real head-scratcher. Fortunately this guide is here to help you get the hang of it, whether you’re new to this or just on the look-out for equipment recommendations.

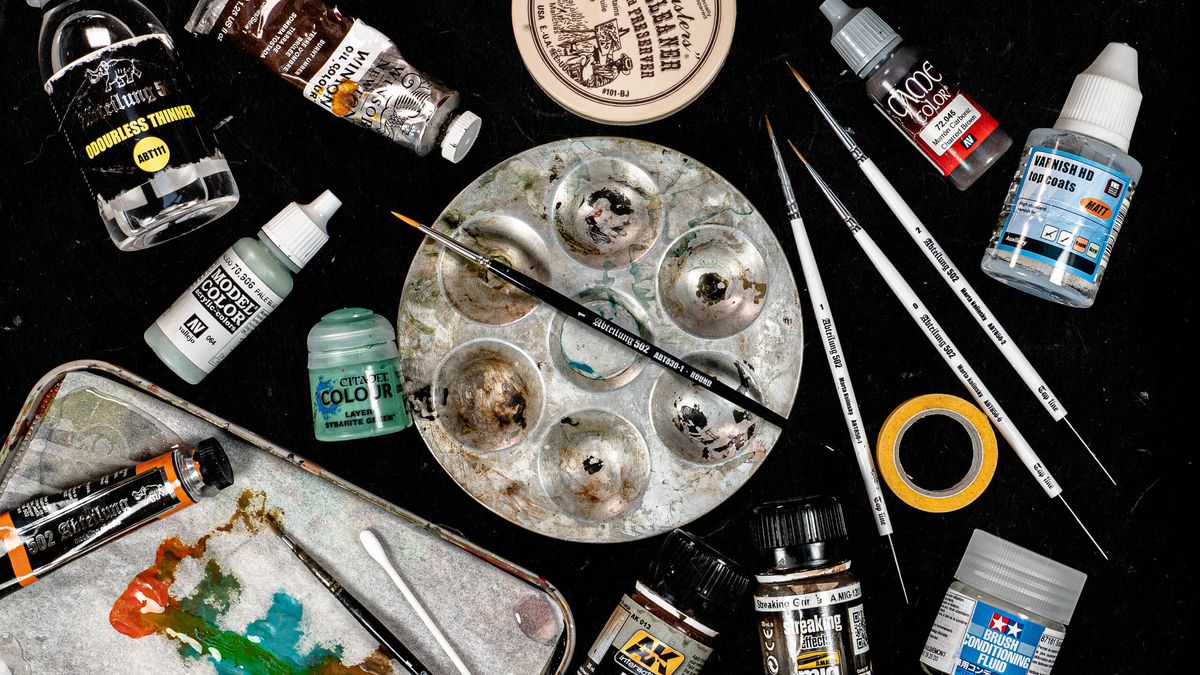
In the first part of this guide dedicated to painting essentials, we will focus on the basic painting equipment, such as brushes and palettes. Then, we'll quickly touch upon the different types of paint you may consider, including acrylics, oil paints, and enamels. We will also take a look at auxiliaries useful for thinning, glazing, and varnishing. Lastly, we'll conclude with a few tips for cleaning your tools and the mandatory personal protection.


Painting equipment

Let’s start with the basics. This section covers the fundamental painting equipment, including fine artist’s brushes for detailed work with acrylics, as well as synthetic brushes that are more affordable and better suited for weathering techniques such as mixing or dry brushing. Furthermore, we will take a look at the different types of palettes, not without forgetting our indispensable water pot, before moving on to paint selection.

Kolinsky sable-hair brushes

Despite their higher price point and need for careful maintenance, kolinsky sable-hair brushes are great for precise miniature painting thanks to their fine tips allowing controlled application. I suggest investing in brands such as Winsor & Newton, Rosemary or Abteilung 502, which offer excellent level-entry brushes at a reasonable price. Sizes #0, #1 and #2 are regarded as the most versatile and are all you need to get started.

Synthetic brushes

When working with thinners and enamel paints, I highly recommend preserving your expensive brushes and using cheap synthetic brushes instead. They can withstand demanding tasks and their good value makes them easy to replace. For maximum versatility stock up on various sizes and shapes from Abteilung 502 or any similar brands. They will be useful in many ways such as mixing, dry brushing and weathering.

Wet palette

A wet palette keeps your acrylic paints moist and workable for longer, making layering, blending, and glazing much smoother. It also helps maintain consistency in your colour mixing and reduces paint waste. Depending on your budget, you can purchase a pre-made wet palette from the likes of RedGrassGames, or make one yourself for little money. While not indispensable, getting to grips with this tool early on is highly recommended.

Mixing palette

It's common practice to use an aluminum well palette for thinning oil and enamel paints. It also comes in handy for turning them into washes while maintaining consistent colour ratios. No need to spend a lot of money on something you can find for cheap in any craft store. If you plan to dilute paint for use in an airbrush, I suggest getting a couple of individual paint trays with a spout instead, rather than mixing it directly into your spray gun.

Water pot

It’s a no-brainer but don’t let the simplicity of this last recommendation fool you—the humble water pot is an indispensable companion in your miniature painting journey. Providing a dedicated reservoir for brush rinsing and paint thinning, it ensures that your brushes stay clean and your paint consistency remains right. Any glass or plastic container will do, so don’t waste money on this, and give your empty mustard jar a second life.


Paints

Now that we've covered the fundamentals, let’s take a quick look at the various types of paint commonly used for miniature painting. You may already be familiar with surface primers and acrylic paints, however settling on a particular brand can be mind-boggling due to the multitude of ranges to choose from. Additionally, we’ll quickly touch upon two other paint varieties worth including in your painting kit, knowingly oil paints and enamels.

Surface primer

Using a surface primer prior to painting is standard practice. It ensures that subsequent paint layers will adhere firmly to the model, while laying the foundations for shadows (i.e. zenithal priming). Many acrylic-based primers are available either for use with an airbrush, or in ready-made spray paint cans. Brands like AK Interactive, Citadel and Vallejo offer all kinds of primer colours, with black, grey and white being the most popular choices.

Acrylic paints

Water-based acrylic paints are popular due to their fast-drying nature and the ability to thin them with water. While there’s an endless debate about which brand is best, experience, personal preferences, and budget are key factors in selecting your paint. Know that Citadel and Scale75 are slightly pricier than others, while AK Interactive, LifeColor and Vallejo are more budget-friendly depending where you are located on the globe.

It’s difficult to make a specific recommendation without going into a detailed comparison of each paint range. As a general tip, don’t buy a large paint set right from the start, stay clear of low-cost brands if you can, start with a few colours and gradually add more to suit your needs. You may also consider choosing a naming system that you’re comfortable with, whether it’s lore-based, referenced in paint guides, or using real-life designations.

Oil paints

Popular oil paint brands include Winsor & Newton and Abteilung 502 (the latter being cheaper). These paints are known for their excellent blending capabilities, perfect for creating seamless colour transitions. They can also be turned into washes for glazing, panelining or streaking (more on that in my weathering essentials guide). Unlike acrylics, oil paints dry slowly and can be worked on longer, toned down, and even partially removed.

Enamel paints

Lastly, enamel paints are primarily used to create authentic-looking weathering effects, panelining, and filters with either a matt or glossy finish. Popular brands include AK Interactive and Ammo by Mig Jimenez among other. Like oil paints, enamels can be thinned with mineral spirits but cure quicker and may or may not have a textured finish. Be careful and ensure good ventilation when working with enamels as their fumes are toxic.


Auxiliaries

Now that we’ve looked at tools and paint, let’s take a peek at other useful products such as acrylic mediums to dilute or turn water-based paints into glazes, as well as retarders and enhancing mediums to slow down or speed up drying time. We’ll also cover mineral spirits for thinning oil and enamel paints. Lastly, we’ll discuss varnish top-coats to preserve your paint jobs, along with masking supplies to shield specific areas from paint.

Acrylic mediums

If you’re having trouble thinning your acrylic paints with only water, adding a few drops of acrylic thinner medium can help you get the ideal viscosity and flow. This will make paint application easier without any clumps or streaks. In the same way, using a glaze medium is helpful to create translucent layers for smooth blending and filtering. Both are optional but worth considering if you’re struggling or want to improve your painting experience.

Retarder medium

In some cases, you may need more time to work or blend specific areas. Using retarder medium with an acrylic paint will considerably extend its drying time. This is also useful for those who are starting out as slow painters and don’t want to worry about premature drying on the palette or the miniature surface. Additionally, using retarder medium can prevent your airbrush from getting clogged due to fast drying paint on the needle tip.

Enhancing medium

As mentioned earlier, oil paints are infamous for taking forever to dry, sometimes requiring several days or more to cure. This can be inconvenient, fortunately an enhancing medium can be used to speed up the drying process and alter the miniature's finish depending which type is used (matt, satin, or gloss). This is exclusively for use with oil paints and can be combined with paint thinner such as mineral spirits to create quick-drying washes.

Thinner

Thinner, also called mineral spirits or turpentine, is a solvent commonly used to dilute oil and enamel paints. It helps control the thickness and transparency of the paint. I highly recommend going with an odourless version from the likes of Abteilung 502, which is a variation of regular thinner with a milder scent, making it a better option for use in enclosed areas. It’s also considered safer due to its lower volatility and reduced emission of fumes.

Top-coat varnishes

It’s common practice to use a protective top-coat varnish to safeguard paint jobs between steps and protect miniatures from damage or wear. These varnishes come in three different finishes, namely matt, satin, and gloss. They can enhance the colours of your minis while making them more durable for handling and display. Although pricier than others, I recommend the Varnish HD series by VMS for its high quality and ease of use.

Masking tape

Masking tape is useful to protect specific areas from getting painted. It’s available in various widths which can be cut to size to create clean separations between colours and prevent paint splatters or overspray when using an airbrush. Furthermore, you can use it to design your own stencils for markings or patterns. I suggest buying high-quality masking tape from trustworthy brands like Gunze or Tamiya so it doesn’t rip your paint off.

Masking fluid

Similarly, masking fluid (also known as liquid mask) creates a temporary barrier that shields certain parts of a miniature from paint during application. It’s applied with either a brush or a sponge prior to painting or airbrushing the top layer. It then dries into a rubbery texture protecting the desired areas from unwanted splatters and overspray. Once the paint job is done, the mask can be peeled off to uncover the untouched areas underneath.

Cleaning supplies

Let’s face it, purchasing hobby equipment can be quite a steep investment when you’re starting from zero. To avoid wasting money by constantly replacing damaged brushes due to improper cleaning or bent tips, I recommend investing in basic maintenance supplies. In this section, we’ll briefly touch upon two options for cleaning and preserving your brushes, which can help extend their lifespan and ultimately save you some trouble.

Brush cleaner

A brush-cleaning solution is helpful to keep your brushes in good condition and preserve their tips between painting sessions. It’s designed to remove paint residue, debris, and any paint buildup that can damage your brushes bristles and render them unusable. I recommend using The Masters' brush cleaner and preserver soap, which is widely considered the top choice on the market and will work with acrylic, oil and enamel paints.

Brush conditioning fluid

You may find that your brushes don't keep their shape despite careful and frequent cleaning. To remedy this, I recommend using brush conditioning fluid from the likes of Tamiya after each cleaning operation. To use, dip the brush into the fluid and gently reshape its tip with your fingers. The fluid will dry on the bristles and maintain the pointy shape until next use. To remove, soak the brush in water and you’re good to go.


Personal protection

Lastly, I can’t stress this enough, but safety should consistently remain your top priority in all your creative pursuits. Although hobbying may appear innocuous, this practice involves generating dust and handling tools or substances that can harm your eyes, lungs, or skin. Therefore, it’s imperative to exercise caution and take appropriate safety measures such as wearing a respirator, glasses, and gloves when necessary.

Respirator

Wearing a mask may sound overkill—and that’s surely why it’s so rarely highlighted—but it’s essential to protect yourself. A respirator is a mask-like device that covers the nose and mouth, along with replaceable cartridge filters designed to filter out harmful dust and particles, gases, vapors, or fumes from the air you breathe. It's a sound investment that will come in handy during all those hobby-related activities that require lung protection.

Safety glasses

Miniature work requires proximity to our subject and the tools involved. Although a paintbrush logically poses no harm, the same cannot be said for pointy blades positioned centimeters away from your eyes or potentially hazardous products. It may seem excessive, but protecting your eyes with safety glasses is an inexpensive yet crucial investment in protection against sharp objects, debris and splashes of dangerous liquids.

Nitrile gloves

As with your lungs and eyes, protecting your hands is just as important when working with products with stinging or toxic properties. Nitrile gloves are an excellent solution, and always come in handy whether you're employing an airbrush, working with enamels, or harmful substances like mineral spirits, resin, and other hazardous chemicals. Acquiring a box of disposable gloves is an inexpensive investment which is set to last a long time.


Parting thoughts

I hope this guide on the fundamentals of painting tools has answered some, if not all of your questions. This list is non-exhaustive, and as a general rule of thumb creating your first hobby toolkit should remain a step-by-step process that caters to your objectives and budget. Starting with the basics and expanding from there is the wisest approach, preventing unnecessary expenses on equipment that may not see much use.

Remember that equipment, while important, won’t make you a better artist. Practice and creativity drive the search for solutions, not vice versa, and you’ll soon learn that less is more when it comes to painting supplies. If you found this post valuable, feel free to subscribe for free to share your thoughts below and keep up to date with future publications. Alternatively, you can become a supporter to help me create more content.