Tools of the Trade: Kitbashing Essentials

Looking to get started with kitbashing? Choosing the right tools can be a real head-scratcher. Fortunately this guide is here to help you get the hang of it, whether you’re new to this or just on the look-out for equipment recommendations.

Tools of the Trade: Kitbashing Essentials

Getting started

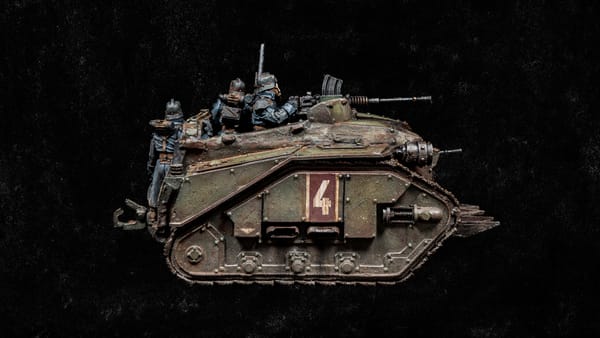
Ready to roll up your sleeves and learn the ropes of kitbashing? First, you’ll need to gather the right tools. The wide range of options to choose from can be overwhelming—especially if you’ve never done this before. Calling upon my own experience, I have designed this series of comprehensive textbooks to help beginners make sense of things and get started in the best conditions. So without further ado, let’s take a closer look at bashing supplies!

Tools of the Trade: Painting Essentials
This comprehensive starter guide dives into the fundamental equipment needed to embark on your miniature painting journey, whether you are a complete beginner or a seasoned hobbyist seeking for tips and recommendations.
Tools of the Trade: Weathering Essentials
As a complement to my guide to painting essentials, let’s go over the equipment you’ll need to master the basics of weathering techniques, whether you’re just starting out or looking for recommandations to upgrade your toolkit.

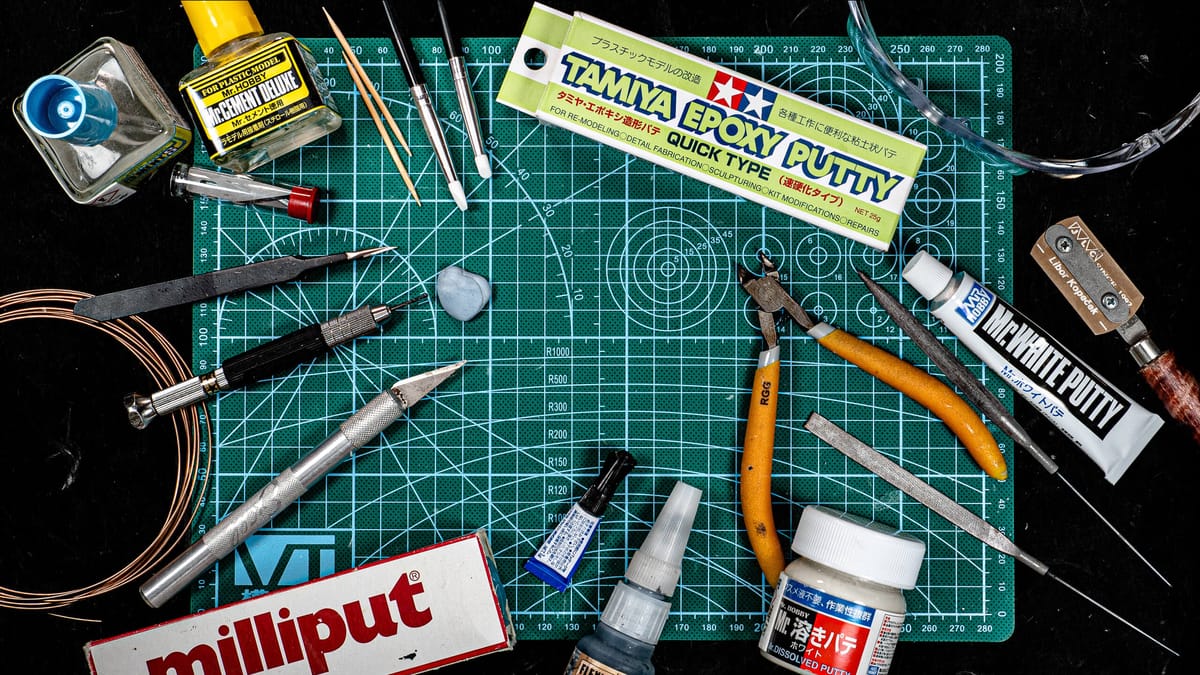
In the first part of this guide we’ll go over the essential tools for cutting, trimming and drilling your way to custom miniatures. We’ll then examine the best options for gluing plastic and resin. Additionally, we’ll review sculpting, gap-filling, and sanding tools. Lastly, we’ll be looking into raw materials commonly used to further detail and customize projects, without forgetting the indispensable protective gear needed to work in safe conditions.


Cutting and drilling

Let’s start with the main tools needed for cutting, trimming, and drilling. This section regroups the fundamental equipment for assembling and bashing miniatures which includes a sharp hobby knife, a pin vise with heavy duty drill bits, as well as a pair of fine detail cutters. Additionally, we will explore other essential tools to further upgrade your kitbashing toolkit, such as a razor saw, some needle files, and a cutting mat.

Hobby knife

A sharp hobby knife is the cornerstone of any kitbasher’s toolkit. It’s essential for cutting, trimming, and cleaning parts from sprues or models. I suggest to get one with swappable blades to cater to different cutting needs and be able to replace them when worn or damaged. I also recommend opting for a well-known brand like Excel or the equivalent as they offer great value for money with a wide variety of blade types to choose from.

Pin vise and drill bits

Having a pin vise and HSS drill bits in your toolbox is indispensable for repositioning and attaching new elements to existing parts of your miniatures. It’s the perfect combo to drill precise holes, insert pins, and join pieces together. These bits are made from a high-speed steel alloy which provides excellent durability, ensuring they can withstand drilling demands through materials such as plastic, resin and metal without bending or breaking.

A photomontage of various tools. From left to right: a hobby knife, sharp blades, a pin vise and a pair of precision nippers

Precision nippers

Nippers are equally essential for removing parts from sprues or models without causing damage or stress marks. They provide much cleaner cuts than hobby knives, making them ideal for separating small pieces. If your budget allows it, I recommend getting a pair of plastic cutters from a reputable brand like Tamiya, Gunze or RedGrassGames. They will last longer as opposed to lower-end models which tend to wear out or break quickly.

Razor saw

Although not essential to get started, a razor saw is useful for cutting through various materials. Its thin-bladed saw is specifically designed for clean and accurate cuts through significant pieces of plastic, brass rods, and styrene profiles. The blade’s fine teeth help in reducing the risk of splintering or damaging the surrounding areas making it ideal for reshaping or salvaging small components and details in the cleanest way possible.

Needle files

Needle files come in all-kinds of shapes and sizes and are useful for smoothing out imperfections such as mold lines and cutting marks. They can also be used to refine angles, curves or flat surfaces. Tamiya sells a reasonably priced three-piece set, however I suggest sourcing jewelry-specific files instead, which are of similar quality but cheaper than their hobby counterparts. Either way, they’re a must-have in your toolbox.

Cutting mat

Lastly, when it comes to cutting and drilling, it’s important to protect your work surface. A self-healing cutting mat is perfect for this. It’s tough and can withstand cuts from hobby knives and other tools. Additionally, it keeps your workspace tidy and prevents accidental damage to your desk. These mats can be found for cheap in any craft stores, coming in different sizes and featuring reference grids helping you make straight, precise cuts.


Gluing

Kitbashing mostly revolves around assembling elements that were never intended to be combined in this way, so using the right adhesives is crucial for achieving seamless results. Plastic cement and super-glue are two options worth considering. We’ll also touch upon tweezers for precise handling, and reusable putty which is perfect for temporarily holding pieces in place while working on them or test-fitting parts prior to final assembly.

Plastic cement

Plastic glue is the lifeblood of all model makers coming in different varieties. Some with a long working time, such as Mr. Cement Deluxe, allowing parts to be repositioned without haste. Others offering a much faster drying time and very low viscosity, such as Mr. Cement S, making it easier to clean and reach small gaps between parts. Both come with an applicator brush, enabling you to apply the glue with accuracy and control.

Super-glue

A high-quality super-glue ensures a robust and long-lasting bond between non-plastic parts such as resin or metal components. To prevent residue stains, use a cyanoacrylate-based glue with a precise applicator nozzle for controlled and neat application. I recently upgraded to the Flexy 5K glue from VMS, and although more expensive than your typical CA glue, its low viscosity makes gluing small parts much more manageable and clean.

Tweezers

Tweezers offer precise control and allow you to position delicate parts accurately. They’re great for handling decals, or reaching places too tight for your fingers. These are subject to lose in precision over time as glue builds up on the tips so you’ll eventually need to replace them. To save money, I suggest buying those intended for small electronic components. Although identical, they’re generally cheaper than their hobby counterparts.

Blu tack

Blu Tack is a reusable adhesive putty commonly used by kitbashers to temporarily hold bits in place prior or during the assembly process. It provides a secure but removable bond, allowing fine tuning and repositioning. This is especially useful when test-fitting parts before permanent attachment, or stabilizing small components while working on them. It’s a cheap consumable that you can find in most office supply departments.


Sculpting and gap-filling

Kitbashing involves assembling disparate parts to form a whole, and in most cases it’s essential to fill gaps between parts to achieve a clean, seamless result. This section covers all the necessary products needed to refine your custom builds; ranging from various types of epoxy putties and crack fillers for joining parts and sculpting unique details, to sculpting tools for shaping and carving, as well as sandpaper for smoothing surfaces.

Epoxy putty

Epoxy putty is an essential sculpting medium with a wide range of uses. It can be low-viscosity, such as Mr. White Putty, which is ideal for filling large gaps and dents. It can take a harder form, like green stuff or Tamiya's quick dry type two-part epoxy, offering excellent elasticity for fusing components and sculpting or modifying existing details. Lastly, Milliput offers similar properties but is slightly more brittle and sands exceptionally well.

Sculpting tools

Sculpting tools are useful for shaping, carving, and refining sculpting materials like the aforementioned epoxy putty. A basic set of clay shapers with metal or silicone tips can go a long way to create and sculpt your own custom details. They come in various sizes, shapes, and hardness to choose from. Pro-tip—make sure to use Vaseline or a dedicated smoothing medium to prevent the tools from sticking to the putty; water works too!

Liquid putty

For jobs requiring meticulous gap-filling, look no further than Mr. Dissolved Putty. It’s near-liquid viscosity and self-leveling properties makes it perfect to address small cracks and dents. It is particularly helpful when plastic cement isn’t enough to fuse components, but traditional solid putty is challenging to apply to the desired area. It has become one of my favorites and I use it all the time to fill crevices or refine surfaces. Highly recommended!

Sandpaper

Sandpaper is an excellent yet inexpensive consumable for achieving a smooth and flawless finish on flat areas, removing surface imperfections, and preparing models for priming and painting. I suggest stocking up on different grits of sandpaper, ranging from coarse to fine, to be able to refine any unwanted texture gradually. Packs of Mr. Waterproof Sandpaper comes at a very competitive price and have proven to last a long time.


Raw materials

Using raw materials is a great cost-effective way to give more substance to your custom minis, vehicles, or scenery. Whether you’re using copper wire and brass rods for joining or strengthening bonds between parts or crafting new intricate details out of styrene profiles and textured plasticard, making custom relief with cork bits for your bases, they all provide an affordable yet practical alternative to your ready-made plastic bits.

Copper wire

When it comes to pinning materials, copper wire is my preferred choice. It’s strong enough to provide structural support yet it’s easy to cut and bend to the desired shape. This makes it ideal for pinning bits togetherstiffening elements to be covered in epoxy putty or creating new details such as handles and so forth. You can find a roll of copper wire (I suggest 0.6 mm in diameter) in every hardware store, and it will last a considerable time.

Brass rods

Although rather expensive, thus entirely optional, brass rods are a fantastic material to use when working on projects involving customization. These durable cylindrical rods are available in a variety of diameters and can serve as structural support for securely positioning miniatures. Smaller diameters can help create fine details, such as extensions for firearms, spear shafts, intricate mechanical parts, empty cartridge shells, you name it.

Styrene profiles

Styrene profiles are available in a ton of different sizes, geometries, and thicknesses, such as empty or solid tubes, beams, flat or angled strips, and more. They can be cut and glued with plastic cement to make custom shapes and are commonly used to create architectural or structural details from scratch. Profiles offer a clean and precise finish and can be combined with regular plastic bits to achieve intricate designs or extend parts.

Plasticard

Plasticard, also known as styrene sheets, are a rigid material available in various thicknesses, sizes, with or without patterns. They are commonly used to add texture to bases, vehicles and scenery, modify or extend existing structural parts, as well as create architectural elements from the ground up. Plasticard can be easily cut to size and glued to achieve the desired shapes, making it an excellent medium for adding new details.

Cork sheets

Just like plasticard, cork is a great, budget-friendly material that can be used to create structural elementsstone-like textures and custom relief on bases and scenery. It is lightweight and can be easily painted over, cut and carved to match the specific pose of a character, and even drilled through to securely pin a miniature in place. The natural grainy texture of cork makes it perfect for creating smaller details like scattered rocks.


Personal protection

Lastly, I can’t stress this enough, but safety should consistently remain your top priority in all your creative pursuits. Although hobbying may appear innocuous, this practice involves generating dust and handling tools or substances that can harm your eyes, lungs, or skin. Therefore, it’s imperative to exercise caution and take appropriate safety measures such as wearing a respirator, glasses, and gloves when necessary.

Respirator

Wearing a mask may sound overkill—and that’s surely why it’s so rarely highlighted—but it’s essential to protect yourself. A respirator is a mask-like device that covers the nose and mouth, along with replaceable cartridge filters designed to filter out harmful dust and particles, gases, vapors, or fumes from the air you breathe. It’s a sound investment that will come in handy during all those hobby-related activities that require lung protection.

Safety glasses

Miniature work requires proximity to our subject and the tools involved. Although a paintbrush logically poses no harm, the same cannot be said for pointy blades positioned centimeters away from your eyes or potentially hazardous products. It may seem excessive, but protecting your eyes with safety glasses is an inexpensive yet crucial investment in protection against sharp objects, debris and splashes of dangerous liquids.

Nitrile gloves

As with your lungs and eyes, protecting your hands is just as important when working with products with stinging or toxic properties. Nitrile gloves are an excellent solution, and always come in handy whether you’re employing an airbrush, working with enamels, or harmful substances like mineral spirits, resin, and other hazardous chemicals. Acquiring a box of disposable gloves is an inexpensive investment which is set to last a long time.


Parting thoughts

I hope this guide on the fundamentals of kitbashing tools has answered some, if not all of your questions. This list is non-exhaustive, and as a general rule of thumb creating your first hobby toolkit should remain a step-by-step process that caters to your objectives and budget. Starting with the basics and expanding from there is the wisest approach, preventing unnecessary expenses on equipment that may not see much use.

Remember that equipment, while important, won’t make you a better artist. Practice and creativity drive the search for solutions, not vice versa, and you’ll soon learn that less is more when it comes to kitbashing supplies. If you found this post valuable, feel free to subscribe for free to share your thoughts below and keep up to date with future publications. Alternatively, you can become a supporter to help me create more content.